
Technique 1 - Large-bore chest drain insertion
- Ensure full aseptic conditions are followed at all times
- Perform surgical hand wash, don surgical gown, mask and sterile gloves
- Open chest drain pack keeping contents sterile, take suture, antiseptic skin preparation, underwater seal system and chest drain from assistant
- Clean the skin using an antiseptic skin preparation such as chlorhexidine and swabs in a circular motion from the point of insertion out in a circular motion
- Apply sterile drapes to maintain sterile field
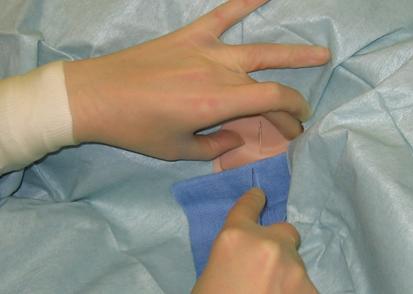
- Make an incision parallel to the rib where the drain is to be inserted. Ensure that this is big enough for the drain (approximately 2-3cm) and goes through all the layers of the skin only
 [D]
[D]Figure 7. Skin incision
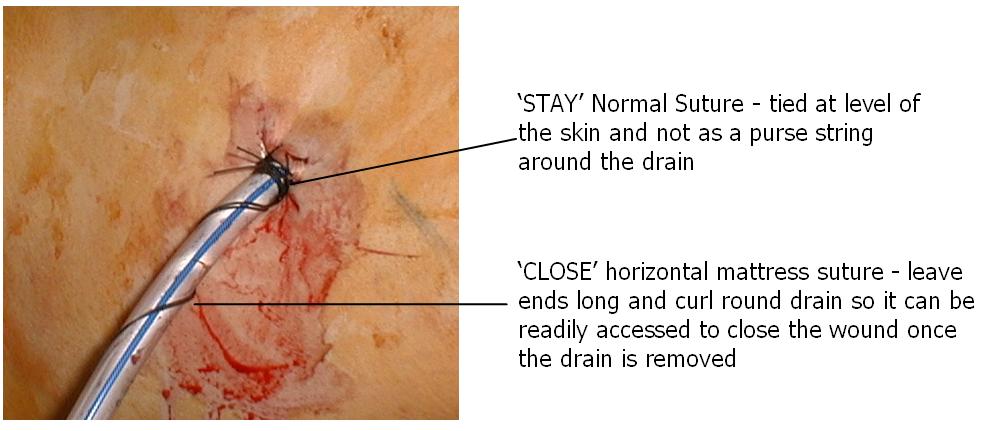
- Many practitioners insert 'stay and close' sutures at this point and clip them to the towels. This avoids the later risk of puncturing the drain with the suture needle.
Click here for a diagram of 'stay and close' sutures
And here for a detailed image of 'stay and close'sutures
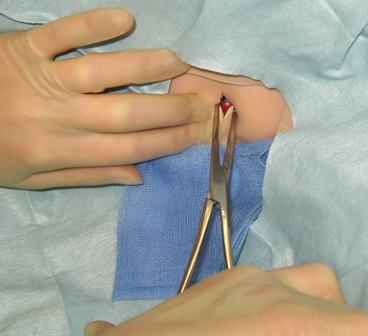
- Using large forceps (Kelly's or similar) blunt dissect through the subcutaneous tissues (open and close forceps to separate rather than cut tissues. Make sure that you dissect down onto the upper border of the rib and open the pleura (you should feel a sudden give and sometimes a hiss of air or flow of blood)
 [D]
[D]Figure 8. Blunt dissection with Kelly's forceps
Best Practice Statement
Blunt dissection should always be used rather than a metal trochar to gain access to the pleural cavity
Rationale: Minimise risk of damage to underlying structures
Source of Evidence: BTS guidelines
- Carefully insert a finger into the pleural cavity and sweep round to make sure that the lung is not adhered to the chest wall, avoid damage to the lung with your finger (CAUTION if the patient has rib fractures as these may puncture your glove)
- Estimate depth of insertion by looking at the markings on the drain and distance from apex of the lung to your incision. All the holes along the length of the drain need to be within the pleural space. Note: holes that are invisible due to being deeper than the skin but superficial enough to lie within the subcutaneous tissue will still cause surgical emphysema
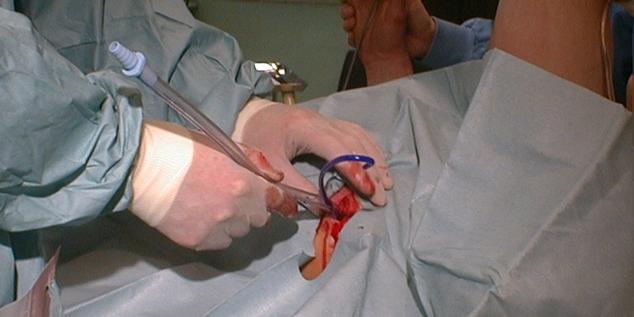
- Insert the drain through the hole in the pleura and into the cavity; aim the drain towards the apex (some drains come with a plastic introducer which helps to facilitate this). Remove the introducer and place a thumb over the end of the drain
 [D]
[D]Figure 9. Drain insertion
- DO NOT LET GO OF THE DRAIN until it is safely sutured in place
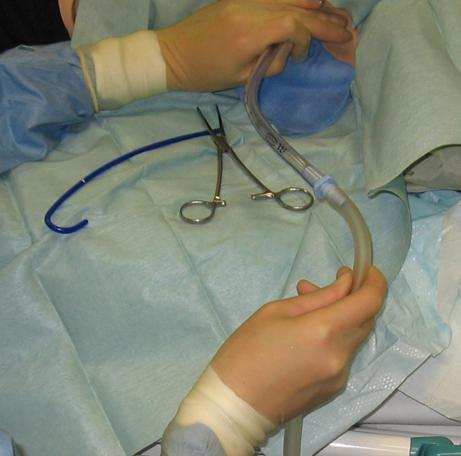
- Attach the end of the drain onto the underwater drainage system (making sure that the drain is 3cm below the water level) and place the chest drain bottle below the patient
 [D]
[D]Figure 10. Connect to tubing
- Check that the water in the chest drain is bubbling or swinging, if in doubt ask the patient to cough gently ie (if inserted previously) or insert a stay suture and a close (mattress) suture that can be used to close the wound when the drain is removed. Make sure you use a strong suture like 1.0 silk or it may snap. Ensure that your stay suture is tight and slightly indents the drain
 [D]
[D]Figure 11. Sutures tied to maintain air-tight seal
Best Practice Statement
All large bore chest drains should be sutured in place, purse-string sutures should not be used
Rationale: To prevent dislodgement of drain and unsightly scarring
Source of Evidence: BTS guidelines
- Remove the drapes
- Secure the drain to the skin using some cut swabs and a dry adhesive dressing, such as cut MEPORE. There is no role for vast watertight dressings like SLEEK as these can increase the risk of wound infection
 [D]
[D]Figure 12. Attaching adhesive dressing.
- Dispose of all waste and sharps appropriately
- Obtain an urgent chest-x-ray to confirm position and document findings yourself
- Check routine observations post drain insertion, and record, start a chart for recording chest drain activity
- Record procedure details, including any complications and results of chest x-ray in the patient's notes.
Best Practice Statement
Large bore chest drains should be used to drain blood or pus as small-bore chest drains may block. Small bore chest drains are as effective as large bore in draining pneumothoraces and cause less pain and scarring
Rationale: selection of appropriate drain size
Source of Evidence: BTS guidelines
After the procedure it is important that the patient should be given important chest drain advice. This predominantly concerns safety, what they can and cannot do, information about how to mobilise, changing position and breathing. They should be advised that they should make sure that the chest drainage system should be kept below the level of the chest at all times. They must seek help immediately if the drain becomes disconnected or they develop respiratory symptoms.
1 |
What is the rationale for the use of blunt dissection when inserting a large bore chest drain?Tick all that apply |